
You invested all that effort and materials in anticipation of a smooth, durable garage floor coating . But soon after installation, you might discover your floor is showing frustrating symptoms: bubbles appearing on the surface, the color starting to yellow, or even large areas of flaking.
These defects are more than just visual annoyances; they’re a direct sign of poor preparation or material selection . A small bubble can quickly turn into a complete coating disaster if you don’t understand the root cause behind these problems .
provide professional root cause analysis and practical repair solutions for the three most common defects of epoxy and polyurea coatings: bubbles, yellowing, and delamination (peeling) in the form of a Q&A .
1. Coating bubble problem: Where do the bubbles come from?
Bubbles and pinholes are among the most common defects in floor construction. They are evidence of a failure in the “dialogue” between concrete and epoxy resin.
What is the root cause of bubbles or pinholes in the coating?
Concrete Outgassing – The Prime Suspect
How it works: Concrete is a porous material filled with air. When a wet coating is applied and the ambient temperature rises (for example, due to sudden direct sunlight or a heater), the air inside the concrete expands. This air attempts to escape through the coating, but is trapped by the still-liquid epoxy resin, forming bubbles.
A2: Overmixing: When mixing epoxy resin too quickly or for too long, a large amount of air is mechanically drawn into the material. These bubbles cannot be released in time after coating and eventually solidify within or on the surface of the coating.
Q2: How to fix or prevent the bubble problem?
The Fix: For small bubbles and pinholes that appear during application, professionals will use a spiked roller or walk around with spiked shoes to release the gas before the topcoat cures. For large, cured bubbles, the only solution is to use a grinder to remove the failed area and reapply the paint.
Prevention: Ensure construction is carried out when temperatures drop or stabilize (usually in the evening or on cloudy days) to avoid sudden temperature increases. The most effective preventative measure is to use a specialized degassing primer , which penetrates and fills the concrete’s pores, permanently trapping gases in the base.
2. Yellowing of coating: Oxidation reaction under sunlight
Yellowing is a visual cancer of epoxy flooring. Once it occurs, it cannot be reversed.
Q3: Why does my epoxy floor turn yellow or amber?
A: Ultraviolet (UV) degradation – the fate of epoxy
How it works: Conventional epoxies , especially aromatic epoxies, are extremely sensitive to ultraviolet (UV) radiation. Prolonged exposure to sunlight—even just the scattered light from an open garage door—initiates oxidation and chemical degradation . These chemical changes break down the coating’s molecular structure, ultimately causing the color to gradually shift from white, gray, or light tones to an unsightly yellow or amber.
Q4: How to avoid yellowing of the coating?
Solution 1: Choose the right topcoat material (mandatory)
Never use conventional epoxy as a topcoat on any area exposed to sunlight.
Preferred Materials: Materials with inherently excellent UV resistance, such as Polyaspartic or Aliphatic Polyurethane , are the industry standard for long-term color stability.
Solution 2: Use UV absorber (auxiliary measure)
Although some high-quality epoxy topcoats have UV absorbers added , this only prolongs the yellowing process and is not as thorough as polyaspartic acid.
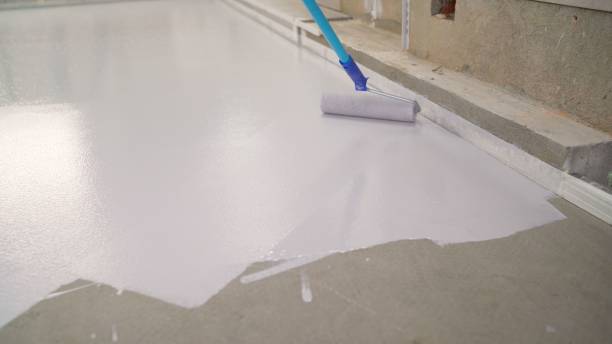
3. Coating delamination and peeling problem: Complete failure of adhesion
Delamination is the most destructive form of coating failure and means that the coating and the concrete substrate have completely “broken up”.
Q5: What are the main causes of coating delamination or peeling?
A1: Insufficient surface preparation (No Profile)
How it works: This is the most common cause. If the concrete surface isn’t ground and roughened enough , the coating won’t form a mechanical bond with the substrate. You’re not applying a floor, you’re applying a giant sticker.
A2: Moisture Vapor Pressure
Principle: As we have repeatedly emphasized, the moisture in the concrete will generate tremendous force under high vapor pressure, tearing the connection between the coating and the substrate from the inside.
A3: Contamination
Principle: Before painting, old oil, silicone sealant, detergent or wax remaining on the surface will form an isolation layer between the coating and the concrete, hindering adhesion.
Q6: How to repair after delamination?
Small areas of peeling: Use an angle grinder to remove loose areas, grind thoroughly to a new roughness, and then reapply primer and topcoat to the repaired area.
Large area failure: If the spalling area exceeds 25%, a concrete grinder must be used to completely remove all old coatings back to the original concrete. Then, a moisture test should be performed to confirm that the root cause has been resolved before reapplying the complete coating system.
In conclusion:
garage floor coatings are essentially the result of compromises in surface preparation and material selection . You can repair defects, but the cost of repair is often higher than the cost of a high-quality application the first time.
For your next flooring project or renovation, don’t skimp on diamond grinding, moisture testing, and a high-performance UV-resistant topcoat like polyaspartic. Adhering to the highest standards of construction from the outset will ensure your floor lasts, performs flawlessly, and becomes a true long-term investment.
What are your most common flooring issues? Bubbling, yellowing, or peeling? How did you ultimately resolve this “flooring nightmare”? Share your repair tips in the comments!
