
Simply painting a nice gray or beige isn’t enough anymore. For car enthusiasts, commercial owners, and those seeking individuality, garage floors have become the new canvas for personal expression and branding. Permanently embedding custom graphics, eye-catching racing stripes, or a sophisticated family logo into the floor coating is the ultimate way to enhance the value and visual impact of your space.
However, this work requires more than simple paint and tape. Custom floor coating design is a complex art that combines precision, specialized materials, and artistic imagination . This article will guide you through the specialized process, key tools, and material selection for creating custom designs (such as logos and line markings) on floor coatings, ensuring your designs are not only beautiful but also long-lasting and won’t peel.
1. Design phase: from high-resolution concept to precise vinyl template
Perfect construction starts with perfect design. You can’t just “hand-paint” on concrete.
Understanding the size and placement of logos and lines
Design Precision: Any custom design on the floor must be precise down to the millimeter . For the logo, the first step is to determine its focal point in the garage , ensuring it remains clearly visible even when the car is parked. For the track stripes, symmetry and spacing must be expertly executed to achieve optimal visual flow.
File preparation: Your logo or design must be converted into a high-resolution vector file that can be used to cut the vinyl template . This is a prerequisite for clean lines and sharp edges; bitmap files (such as JPG) will result in blurry edges.
Make professional-grade vinyl stencils
What the stencil does: The vinyl stencil is the “Velcro” for achieving crisp, professional lines and logo edges. The stencil must adhere securely to the cured flooring substrate, yet remove cleanly and seamlessly after application , leaving no glue residue or tearing patterns.
2. Construction Art: The Technical Process of Embedding Logos and Customized Patterns
The application process of the custom pattern must be carried out at specific points in the multi-layer coating system. If one step is wrong, all will be lost.
Step 1: Primer and base color layer
Base Color Foundation: First, like all professional flooring, a primer (to ensure adhesion) and base color layer must be applied. It is crucial that this layer is fully cured to provide a flat, hard and chemically reactive canvas for the application of the formwork .
Step 2: Accurate template positioning and critical sealing
Positioning: Using a laser level, tape measure, and precise marking tools, precisely position the vinyl template over the cured base color layer. Ensure there are no bubbles or wrinkles on the surface of the template.
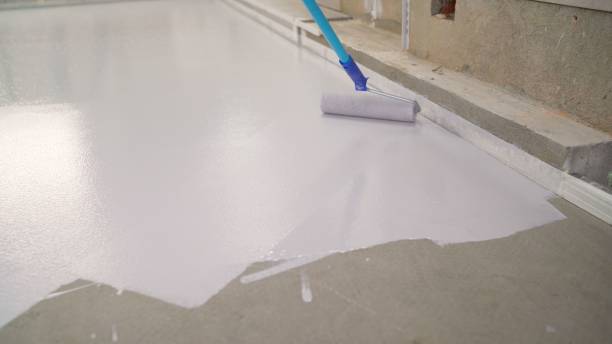
The Edge Sealing Trick: Before applying the graphic color, professionals perform a crucial step: applying a thin coat of clear epoxy (or a system-matching varnish) and gently rolling it over all edges of the stencil. This thin layer of clear coat penetrates the tiny gap between the stencil and the base color layer and cures. The goal is to seal the stencil edges, completely preventing subsequent graphic pigments from seeping under the stencil. This step ensures sharp, knife-cut edges.
Step 3: Pattern color application and quick peeling
Pattern Color: Apply the pattern color (logo or stripe color) accurately to the open areas of the template. Ensure the coating is even and the thickness is compatible with the entire coating system.
Timing is everything: This is the crucial moment that determines success or failure. The pattern color must be peeled off immediately and carefully , while the coating is still wet but has begun to set . Waiting too long, after the pattern pigment has fully cured, and peeling off the stencil may tear the pattern at the edges, resulting in failure. Peeling quickly reveals sharp edges.
3. Line marking: durability and anti-slip requirements
Whether it’s decorative racing stripes or functional parking space markings, they also require professional treatment.
Track stripes: Track stripes or parking space markings often require the same stenciling and sealing techniques as logos to ensure sharpness.
Anti-slip Integration: For areas requiring high safety, such as workshop aisles or commercial basements, embedded striping and logos must also incorporate an anti-slip aggregate (such as aluminum oxide) to ensure they have the same anti-slip coefficient as the surrounding floor. You don’t want your logo to become a slippery “death trap.”
In conclusion:
Custom garage floor coating is the highest form of floor finishing. Its success depends on mastering vinyl template technology, precise edge sealing and peel timing .
Custom logos and graphics not only enhance the personalization and brand value of a space , but also elevate the floor from a simple protective layer to a unique , functional work of art . If you dream of a garage with racing stripes or a family crest, make sure your contractor has the experience to execute this precision art .
Do you have a logo or design you’d like to see embedded in your flooring? Share your dream custom design or the coolest flooring design you’ve ever seen in the comments!
