The garage floor of your dreams should be smooth, solid, and shiny, but if after a few months you find that the coating begins to peel off , the surface is covered with bubbles , or even the originally bright color begins to yellow , the frustration is huge.
Garage floor coating failure is a common nightmare for most DIY enthusiasts and even some unprofessional contractors . The good news is that the source of these problems can almost always be traced back to three key missteps in the application , rather than the coating material itself.
Just as the foundation of a skyscraper is the key to success, in the world of epoxy flooring, preparation and environmental control are 90% of the key. This article will break down the science behind these common symptoms and provide practical solutions for epoxy floor repair and prevention, helping you avoid the pit of rework.
1. Coating peeling: unstable foundation, everything is in vain
The most common and frustrating garage floor coating failure is coating flaking . It occurs when the coating fails to “anchor” to the concrete substrate.
Root cause: Fatal flaw of insufficient surface preparation
The golden rule of surface preparation: Imagine trying to tape a smooth, dusty glass surface – it’s bound to fail. Epoxy coatings require a sufficiently porous and rough concrete surface (often referred to as CSP 2-3) to grip like Velcro.
Limitations of acid etching: The acid etching method recommended by many DIY kits , although simple, often only cleans the surface but cannot create a sufficiently rough anchoring profile required for the coating .
Professional Solution: Mechanical grinding is the only professional-grade solution. It removes “laitance” and old coatings from the concrete surface and creates a uniform, coarse sandpaper-like surface texture, ensuring deep penetration and adhesion of the coating.
Invisible killers: moisture and pollutants
Residual moisture vapor pressure: Concrete is a porous material and can retain a significant amount of moisture. If coated while damp, this moisture can evaporate into steam as the ambient temperature rises, generating enough pressure to physically lift and peel the garage floor coating from the substrate .
Precautions: A moisture test (such as a calcium chloride test) must be carried out before construction . If the humidity is too high, a special moisture barrier primer must be applied first .
Incomplete degreasing: Any residue from old motor oil, tire shine, or other chemicals will form a “release film” that prevents the coating from adhering. Thorough degreasing with a strong degreaser is essential before painting .
2. Bubbles and pinholes: failure of environmental control
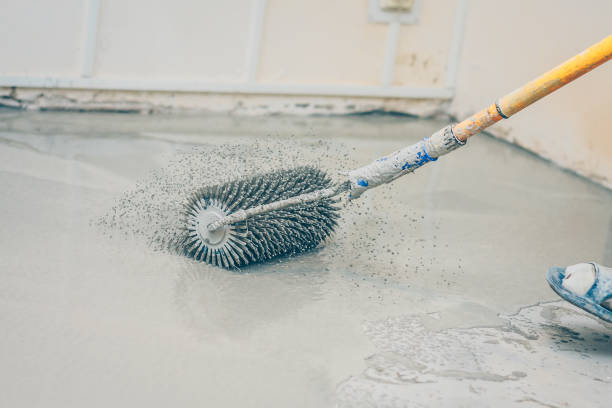
When tiny bubbles or pinholes appear after a coating has cured, this is almost always related to the environment or mixing method used during application.
Culprit A: Concrete Outgassing
Explanation of the phenomenon: When sunlight shines directly on the garage floor or the ambient temperature rises suddenly, the air or trace moisture inside the concrete is heated and penetrates upward into the wet epoxy coating, causing coating bubbles .
Preventative strategies: Avoid applying during peak sunlight hours (10 AM to 4 PM) or when temperatures rise most rapidly. Professionals typically paint in the early morning or evening when temperatures stabilize or drop. Additionally, use a high-solids** epoxy primer to better seal pores and reduce outgassing.
Culprit B: Mechanical errors from improper mixing
Mechanical Error: Rapid or excessive mixing of the A/B components of epoxy resin can introduce large amounts of air into the material. This air cannot escape quickly and will eventually leave visible pinholes on the coating surface .
Prevention strategy: Follow the manufacturer’s instructions closely and use a slow-speed drill (usually 300-450 RPM) and a professional mixing paddle for low, slow mixing.
Bubble Repair: Sanding and Topcoat Covering
Repair Solution: For minor bubbles that have already cured, you can** lightly sand the top of the bubble, then clean it with a clean vacuum cleaner and finally reapply a layer of clear topcoat** to reseal the surface.
3. Yellowing: Color betrays you in the sun
Your gray or white epoxy floor starts to yellow after a few months in the sun and looks old and dirty.
The scientific reason for yellowing: Traditional epoxy resin is not UV resistant
Photodegradation: Most traditional epoxy resins are not designed for UV resistance. Prolonged exposure to sunlight (even sunlight coming through a window) can chemically decompose epoxy, causing it to yellow or “amber” in color.
Prevention strategies: Never use pure epoxy resin outdoors or in areas exposed to long periods of direct sunlight. Always apply a protective topcoat with UV resistance , such as polyurea or polyaspartic, over the epoxy primer .
Yellowing Repair: Upgrade with Polyurea Topcoat
Repair: If your garage floor coating has already yellowed, you can’t reverse the chemical reaction. The only solution is to thoroughly clean, lightly sand the surface, and then apply a new coat of polyaspartic/polyurea topcoat . This new topcoat will cover the old yellowing and provide long-term UV protection for your floor.
In conclusion:
Garage floor coating failures can almost always be attributed to neglecting the concrete base preparation , moisture control , and application environment . When you embark on your next coating project, devote 90% of your time and energy to grinding, cleaning, and testing .
As Warren Buffett said, “You can’t build a good building on a bad foundation.” Make sure your concrete foundation is perfectly prepared so your garage floor investment is likely to last.
What problems have you experienced with your epoxy flooring? What do you think is the most effective repair method? Share your experiences in the comments!
