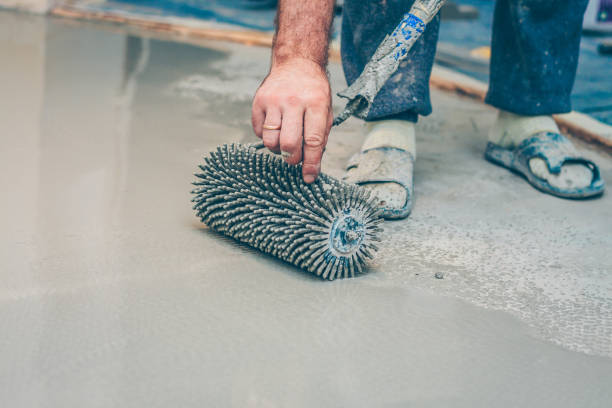
You’ve invested time and money in sanding your concrete garage floor to a smooth, rough finish and applying a high-quality epoxy coating, only to discover, months later, that your floor is bubbling , bulging, or even large areas of peeling .
Many people assume it’s due to a bad primer or improper surface preparation. But a more subtle and deadly culprit is quietly destroying your investment: moisture trapped within the concrete .
Moisture is public enemy number one for garage floor coating adhesion . This article reveals how vapor pressure from evaporating water can tear apart your coating, explains the concrete moisture testing methods used by professionals , and provides detailed guidance on how to properly apply a moisture barrier —the key to ensuring the longevity of your floor.
1. Know Your Enemy: The Science of Moisture Migration
Your concrete garage floor isn’t a solid rock, it’s a giant sponge.
Concrete’s “capillary action” and water vapor penetration
Source of moisture: Concrete is porous, and moisture is drawn in from the moist ground or surrounding environment through capillary action and continues to migrate upwards – a process known as moisture infiltration .
Mechanism of damage: When you seal the concrete surface with a garage floor coating (epoxy or polyurea), rising moisture becomes trapped between the coating and the concrete. When the garage heats up (like in the summer or under direct sunlight), the moisture heats up, creating a strong vapor pressure . This force, though invisible, is powerful enough to tear the bond between the coating and the concrete, causing the floor to peel and bulge .
Critical Value: How Much Humidity Can Your Coating Withstand?
Moisture Vapor Transmission Rate (MVER): Professional flooring manufacturers will provide the maximum moisture vapor transmission rate (MVER) their products can withstand , usually in pounds. If your concrete MVER reading is higher than the manufacturer’s recommended 3-5 pounds per 1000 square feet per 24 hours, then you need to take intervention measures.
Relative humidity (RH): Again, relative humidity (RH) is a critical indicator. Most high-quality coatings can withstand a critical RH value between 80% and 90%. Once this threshold is exceeded, the risk of failure increases exponentially.
2. The essential step: Professional concrete moisture testing
Professional contractors don’t leave things to chance. They rigorously perform moisture testing before painting. As a homeowner, it’s crucial that you understand these testing methods.
Calcium Chloride Test (MVER): Measuring Evaporation Rate
Method Description: The calcium chloride test is the most common MVER measurement method used in the industry. It involves placing a pre-weighed calcium chloride bag sealed in a plastic dome on the concrete surface for 60 to 72 hours. The calcium chloride absorbs the evaporated water.
Guidance: After testing, reweigh the area and calculate the amount of water (in pounds) that evaporates in 24 hours per 1,000 square feet. If the reading exceeds the standard, you must use a moisture barrier .
Relative Humidity (RH) Probe Test: The Most Accurate Readings
Method introduction: The relative humidity (RH) probe test is considered the most accurate measurement method. It involves drilling a hole into the concrete (to a depth of approximately 40% of the slab thickness) and inserting a specialized electronic probe.
Why it matters: The RH probe directly measures the humidity level inside the concrete , predicting the maximum humidity that water vapor may eventually reach. This is the gold standard for evaluating whether a moisture barrier is necessary.
DIY Simple Test: Plastic Sheet Test
Method: You can use an 18×18 inch piece of plastic and tape the edges to seal it to the concrete for 24 hours.
Limitations: If condensation forms under the plastic the next day, that indicates moisture is present. However, this is only a qualitative test (presence/absence) and doesn’t provide quantitative, professional data to support a decision about investing thousands of dollars in a repair.
3. Moisture barrier: the key to floor adhesion
If your moisture test readings are off the charts, then a moisture blocker is your only hope.
The Science of Barriers: Permanently Sealing Water Vapor
Material Type: A moisture barrier is typically a specialized, high-solids epoxy primer designed to penetrate deeply into the concrete’s pores.
Mechanism of Action: This barrier reacts with chemicals within the concrete to form a dense, impermeable chemical film between the concrete surface and the coating. This permanently seals moisture deep within the concrete , preventing it from migrating to the coating interface, thereby eliminating the threat of vapor pressure.
Correct application and precautions
The first level of protection: Moisture blockers must be applied as the first coat after the concrete has been ground and thoroughly cleaned .
Thickness requirements: You must apply the coating to the manufacturer’s recommended thickness (usually between 10 and 15 mils) to ensure a completely sealed barrier. Applying it thinly or skipping this step is irresponsible with your investment.
In conclusion:
garage floor coating is not luck, but science. In the entire construction process, the most easily overlooked by homeowners or non-professional contractors is precisely the critical link of concrete moisture testing and blocking .
Don’t rest your long-term investment on an uncertain foundation. Before investing the expensive time and materials required for a topcoat, always have your concrete professionally moisture tested . If the readings exceed the specified limits, applying a professional moisture blocker is your only insurance policy for the adhesion and long-term life of your floor .
Have you ever experienced floor failure due to moisture issues? How did you resolve it? Share your experience in the comments section to help other homeowners avoid the same mistakes!
